
sales06@switek.biz

+86 186 5927 5869

Subscript to Us
sales06@switek.biz
+86 186 5927 5869
Subscript to Us
Keywords:Panasonic A6 Servo Installation Instruction, Panasonic A6 Driver, Panasonic A6 Series Servo Motor Manual
The led front panel of the Panasonic A6 servo motor driver will display the running status of the motor and the alarm code if there's an alarm occurred during the running of the system. It's also the interface of Panasonic A6 servo motor to the operator in parameter setting.
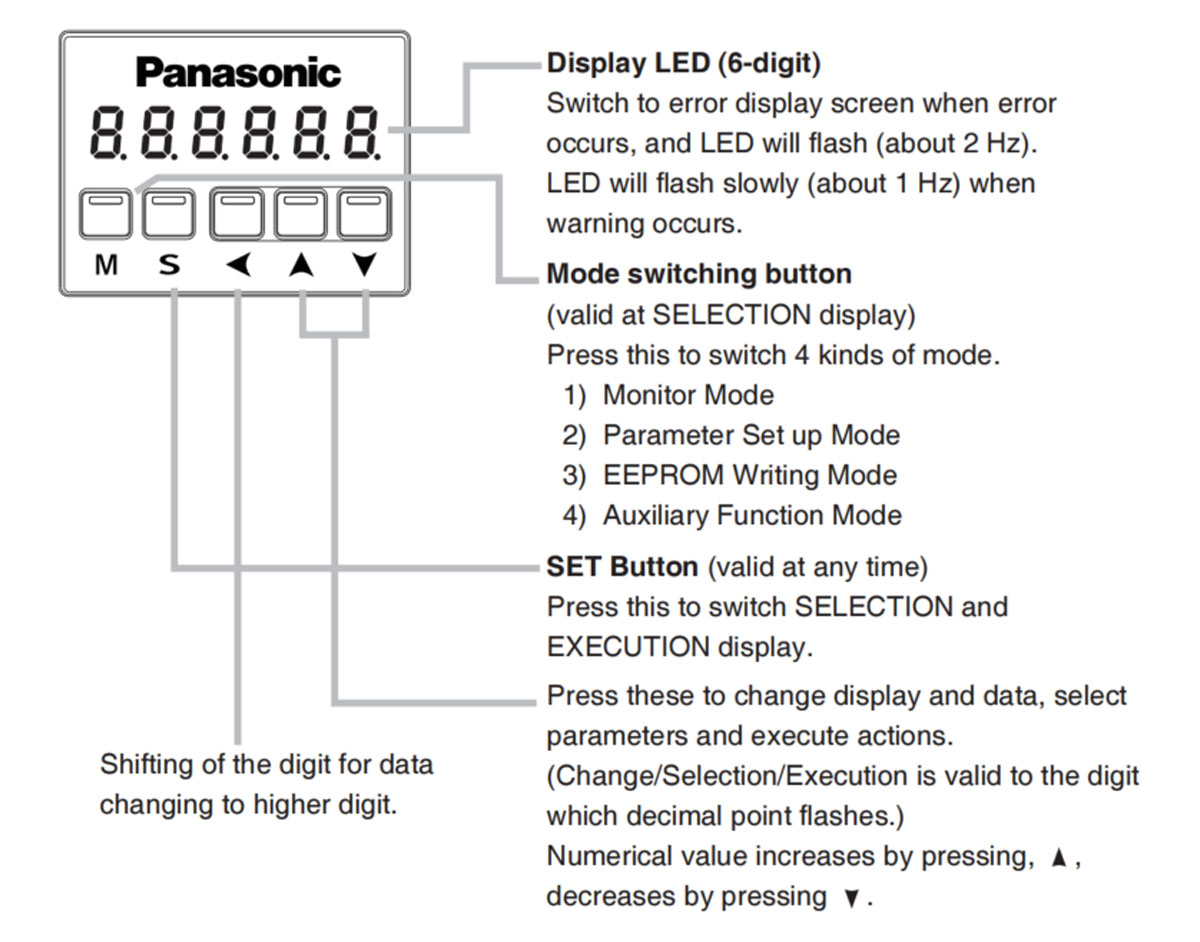
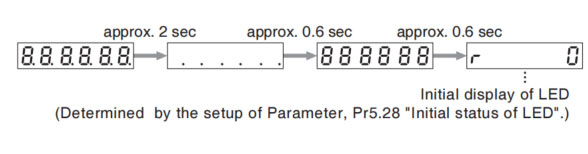
Front panel display shows the following after turning on the power of the driver.
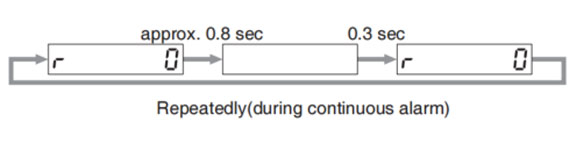
If a driver alarm is generated, the front panel display shows the following repeatedly.
Below shows possible cause of an alarm.
| Alarm No. | Alarm | Content |
|---|---|---|
| A0 | Overload | Load factor is 85% or more the protection level. |
| A1 | Over-regeneration alarm | Regenerative load factor is 85% or more the protection level. |
| A2 | Battery alarm | Battery voltage is 3.2V or lower. |
| A3 | Fan alarm | Fan has stopped for 1 sec. |
| A4 | Encoder communication alarm | The number of successive encoder communication errors exceeds the specified value. |
| A5 | Encoder overheat alarm | The encoder detects overheat alarm. |
| A6 | Oscillation detection alarm | Oscillation or vibration is detected |
| A7 | Lifetime detection alarm | The life expectancy of capacity or fan becomes shorter than the specified time |
| A8 | External scale error alarm | The external scale detects the alarm |
| A9 | External scale communication alarm | The number of successive external scale communication errors exceeds the specified value. |
| AC | Deterioration diagnosis warning | Load characteristic estimates and torque command under constant speed has exceeded set range. |
| C3 | Main power off warning | In case that Pr7.14 (Detection time of main power off warning) is 10 to 1999, the mains power between L1 and L3 has stopped instaneously for more than the time prescribed in Pr7.14. |
Related page → • P.4-6 to 4-85 "Details of Parameter"
HD210LDY -- HaiDa Hybrid Injection Molding Machine
| No. | Name | Value |
|---|---|---|
| 1 | Clamping Force | 2100 kN |
| 2 | Shot Weight | 257 g |
| 3 | Shot Speed | 200 mm/s |
| 4 | Screw Diameter | 40 mm |
| 5 | Opening Stroke | 500 mm |
| 6 | Space Between Tie Bars | 530 x 530 mm |
| 7 | Mold Thickness (Min) | 200 mm |
| 8 | Mold Thickness (Max) | 550 mm |
| 9 | Pumper Motor | 90 kW |
| 10 | Heating Capacity | 13 kW |
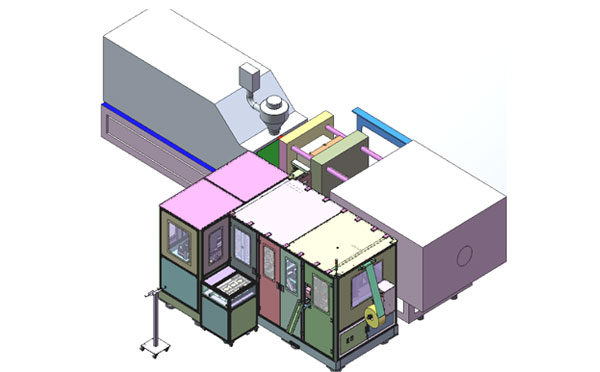
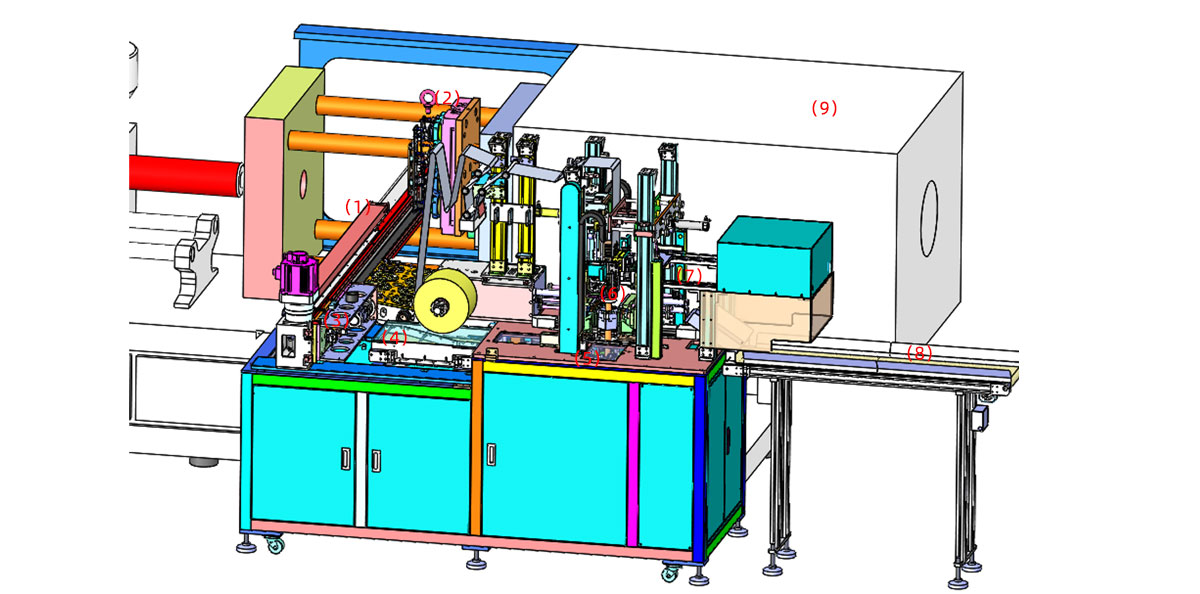
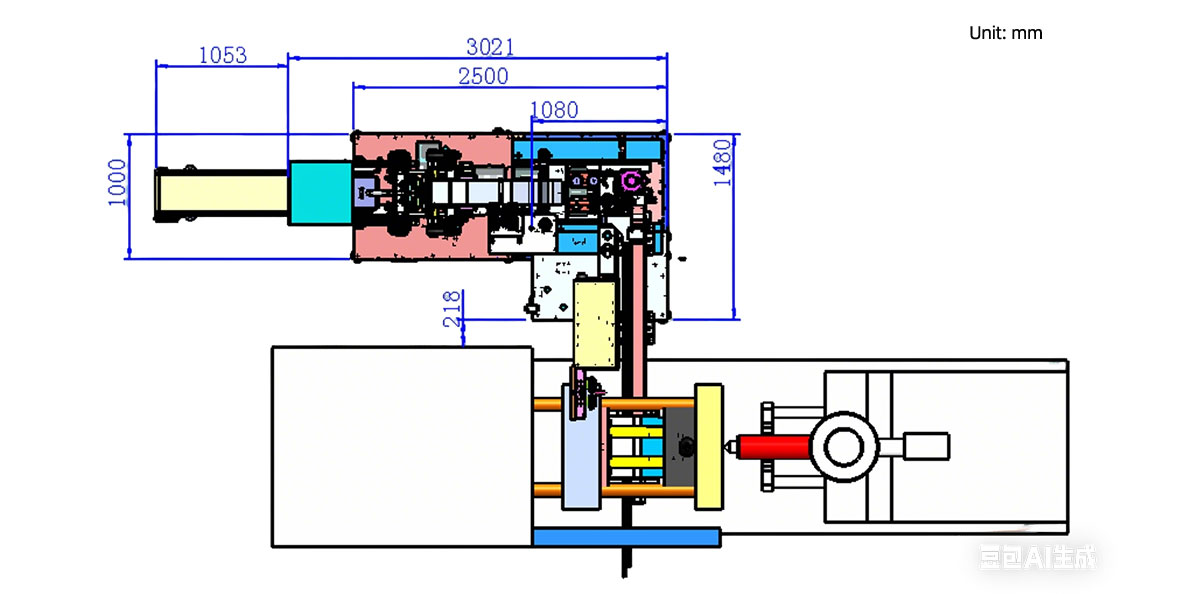
The SWITEK side entry petri dish packing system is a custom made automation system for the stable production of laboratory consumable plastic petri dish with the picking robot, the petri dish assembly, stacking, packing unit etc. integrated as auniformed system for the efficient and stable production of the petri dish. The system can be custome made for a petri dish mold layout design of 2+2, 4+4, 6+6, 8+8 etc.
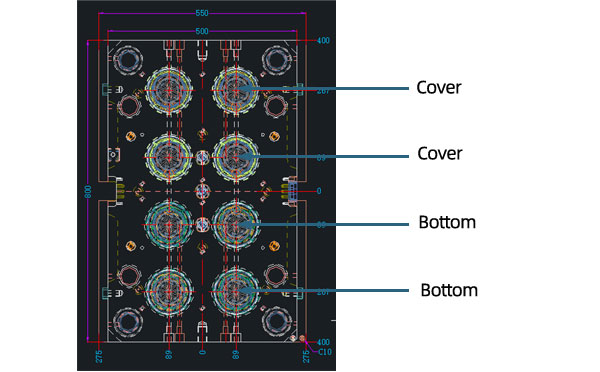
Mold Layout Deisgn
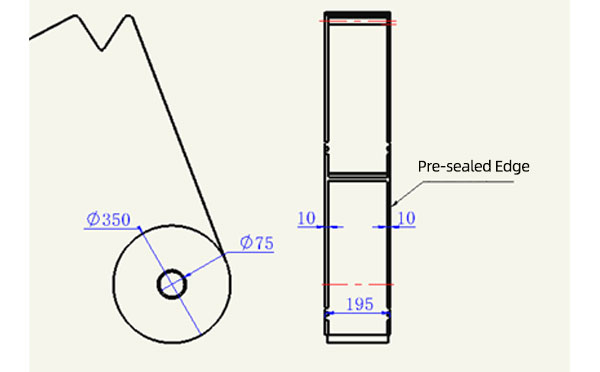
Sleeve Size for Package with Vacuum Request
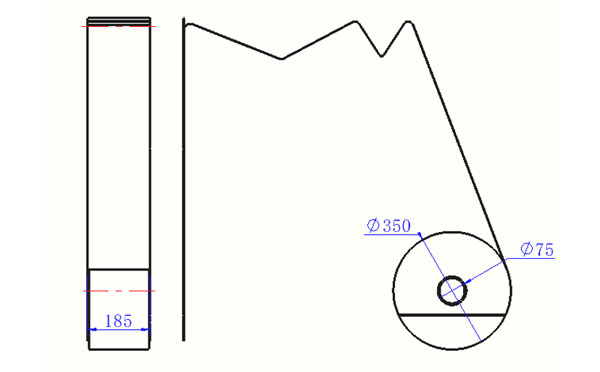
Sleeve Size for Package without Vacuum Request
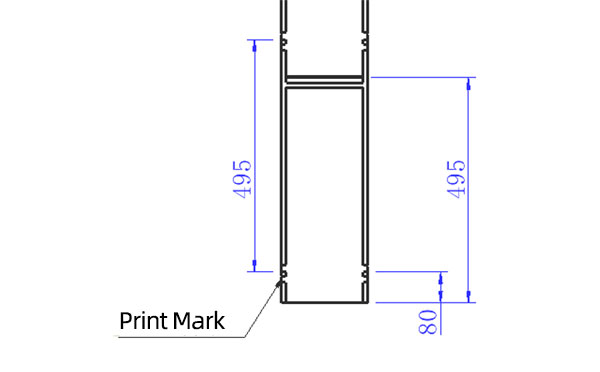
Sleeve (With Mark) Size for Package with Vacuum Request

Sleeve (With Mark) Size for Package without Vacuum Request
I think you'll have an overall understanding about the SWITEK top/side entry petri dish packing system. If you still have any other question about it or need any help in your petri dish production project, please feel free to contact SWITEK laboratory consumable plastic parts injection molding solutions team for more information.
HuangYanZheng©Copy Right


