
sales06@switek.biz

+86 186 5927 5869

Subscript to Us
sales06@switek.biz
+86 186 5927 5869
Subscript to Us
The I/O here is for the input/output signal of the robotic arm, which is for the operators to watch up the communication between the robotic arm and the injection molding machine. It's a reference for you to diagnose what's wrong with the robotic arm either because of the ill wiring or wrong programming. The I/O page together with the alarm history will help you to find a solution of any robotic arm faulty fast.
Click the Monitor menu item in the main menu bar will open the monitor page, as shown below:
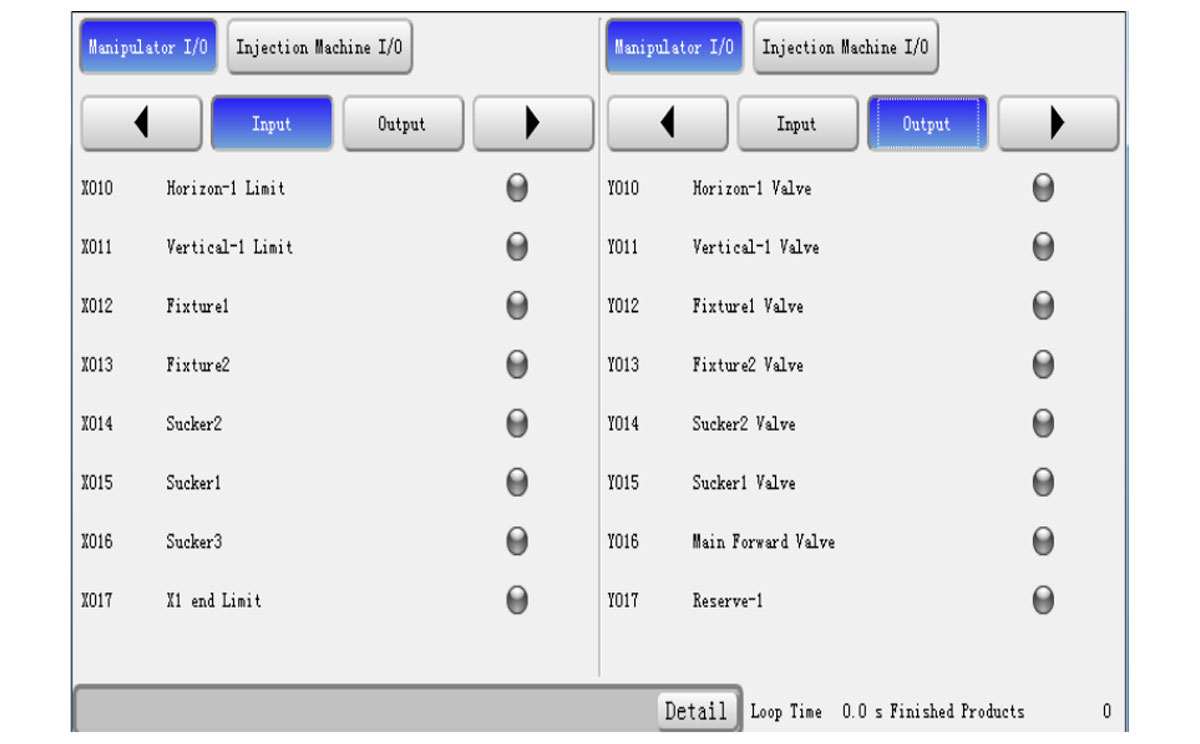
The window is seperated into two parts with the left side and the right side independent. You can view the input and output signal at the same time. Click the Injection Machine I/O button will open the injection molding machine I/O signal monitor.
Click the Alarm menu item in the main menu bar will open the alarm history page, as shown below:
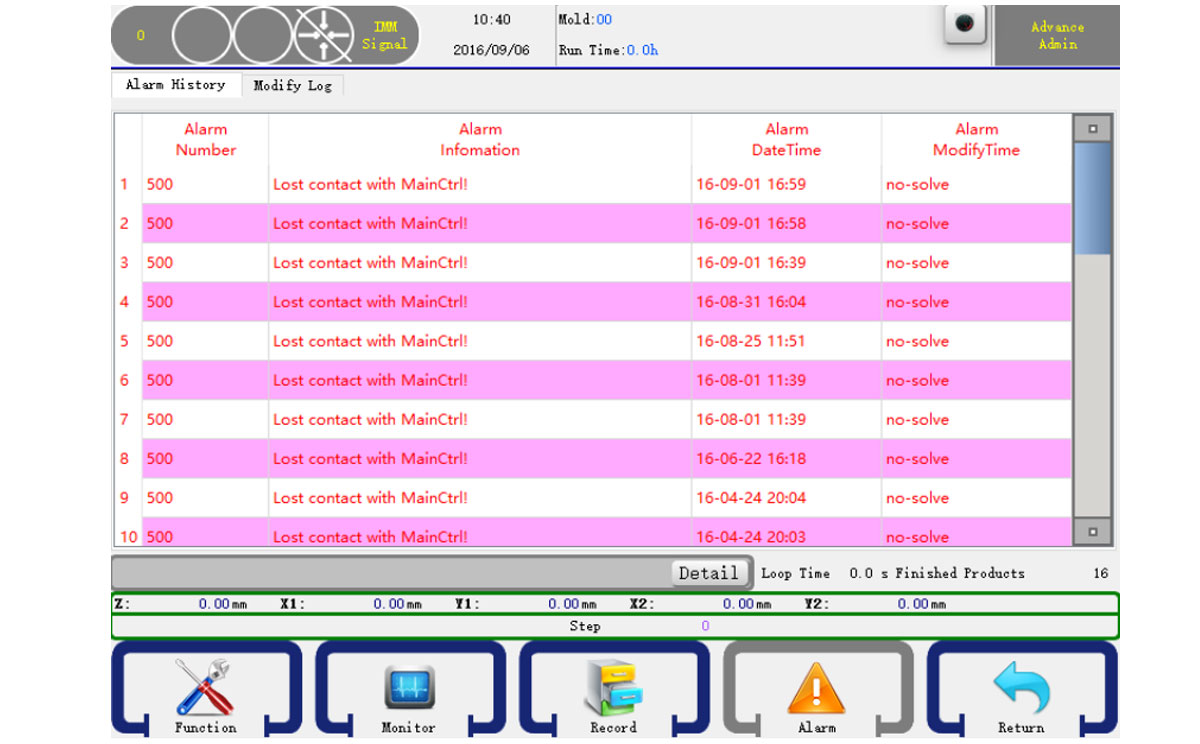
The latest 50 alarm records sill show up in this page.
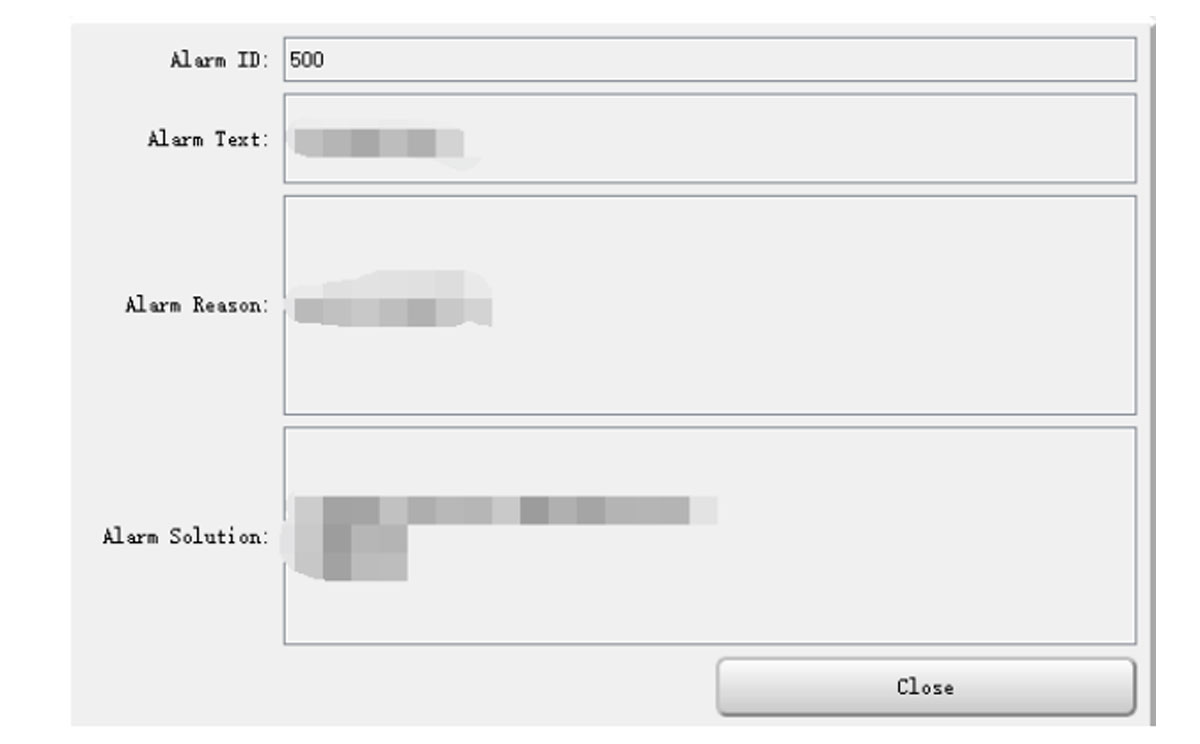
If the machine has an alarm, click the "detail" button.
| Code | Alarm Information | Alarm Reason |
|---|---|---|
| 1190 | Main upper limit is not both on when Traverse out to in | Z axis traverse from inside security zone to outside security zone, main arm upper limit is off. |
| 1192 | Current position is less than the permit security position | Current position is less than the permit security position |
| 1193 | Current position is larger than the permit security position | Current position is larger than the permit security position |
| 1200 | Confirmation signal's error with Fixture 1 ON | Signal checking error after Fixture 1 ON |
| 1201 | Confirmation signal's error with Fixture 1 OFF | Signal checking error after Fixture 1 OFF |
| 1202 | Confirmation signal's error with Fixture 2 ON | Signal checking error after Fixture 2 ON |
| 1203 | Confirmation signal's error with Fixture 2 OFF | Signal checking error after Fixture 2 OFF |
| 1204 | Confirmation signal's error with Fixture 3 ON | Signal checking error after Fixture 3 ON |
| 1205 | Confnirmation signal's error with Fixture 3 OFF | Signal checking error after Fixture 3 OFF |
| 1206 | Confirmation signal's error with Fixture 4 ON | Signal checking error after Fixture 4 ON |
| 1207 | Confirmation signal's error with Fixture 4 OFF | Signal checking error after Fixture 4 OFF |
| 1208 | Confirmation signal'ss error with Sucker1 ON | Singal checking error after Sucker 1 ON |
| 1209 | Confirmation signal's error with Sucker 1 OFF | Signal checking error after Sucker 1 OFF |
| 1210 | Confirmation signal's error with Sucker 2 ON | Signal checking error after Sucker 2 ON |
| 1211 | Confirmation signal's error with Sucker 2 OFF | Signal checking eror after Sucker 2 OFF |
| 1306 | Please check the standby point Fixture 1 | Fixture 1 must be OFF when standby, Please check. |
| 1307 | Please check the standby point Fixture 2 | Fixture 2 must be OFF when standby, Please check |
| 1308 | Please check the standby point Fixture 3 | Fixture 3 must be OFF when standby, Please check |
| 1309 | Please check the standby point Fixture 4 | Fixture 4 must be OFF when standby, Please check |
| 1310 | Please check the standby point Sucker 1 | Sucker 1 must be OFF when standby, Please check |
| 1311 | Please check the Standby point Sucker 2 | Sucker 2 must be OFF when standby, Please check |
| 1400 | Y-axis is not detected limit when rise | Main arm isn't in the up position in Auto, you should make it origin manually. |
| 1403 | Y2-axis is not detected limit when rise | Sub arm isn't in the up position in Auto, you should make it origin manually |
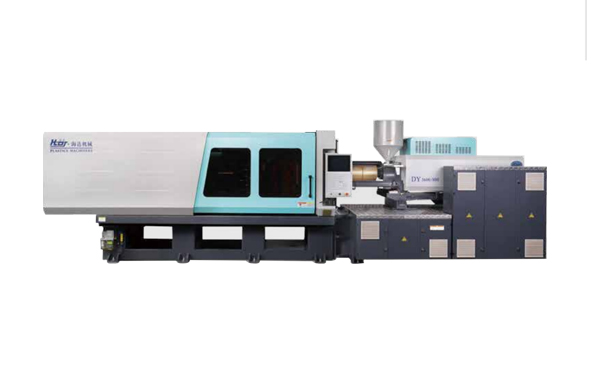
HD170LDY -- HaiDa Hybrid Injection Molding Machine
| No. | Name | Value |
|---|---|---|
| 1 | Clamping Force | 1700 kN |
| 2 | Shot Weight | 114 g |
| 3 | Shot Speed | 200 mm/s |
| 4 | Screw Diameter | 32 mm |
| 5 | Opening Stroke | 440 mm |
| 6 | Space Between Tie Bars | 470 x 470 mm |
| 7 | Mold Thickness (Min) | 200 mm |
| 8 | Mold Thickness (Max) | 520 mm |
| 9 | Pumper Motor | 56 kW |
| 10 | Heating Capacity | 11 kW |
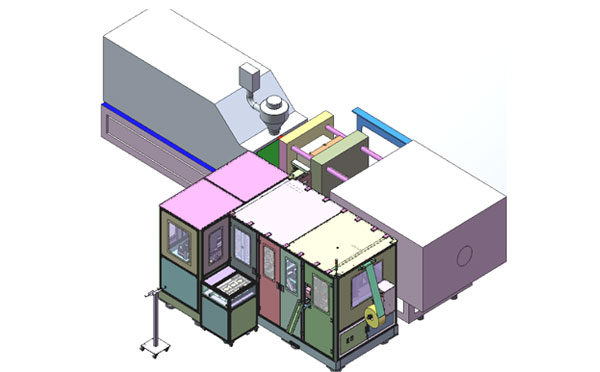
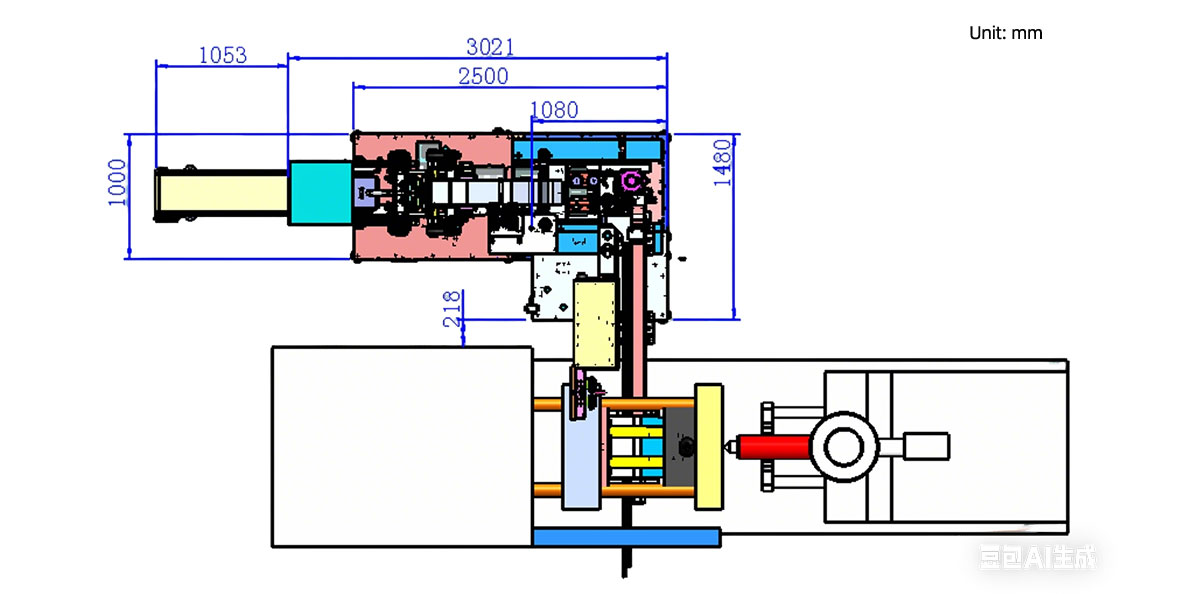
The SWITEK side entry petri dish packing system is a custom made automation system for the stable production of laboratory consumable plastic petri dish with the picking robot, the petri dish assembly, stacking, packing unit etc. integrated as auniformed system for the efficient and stable production of the petri dish. The system can be custome made for a petri dish mold layout design of 2+2, 4+4, 6+6, 8+8 etc.
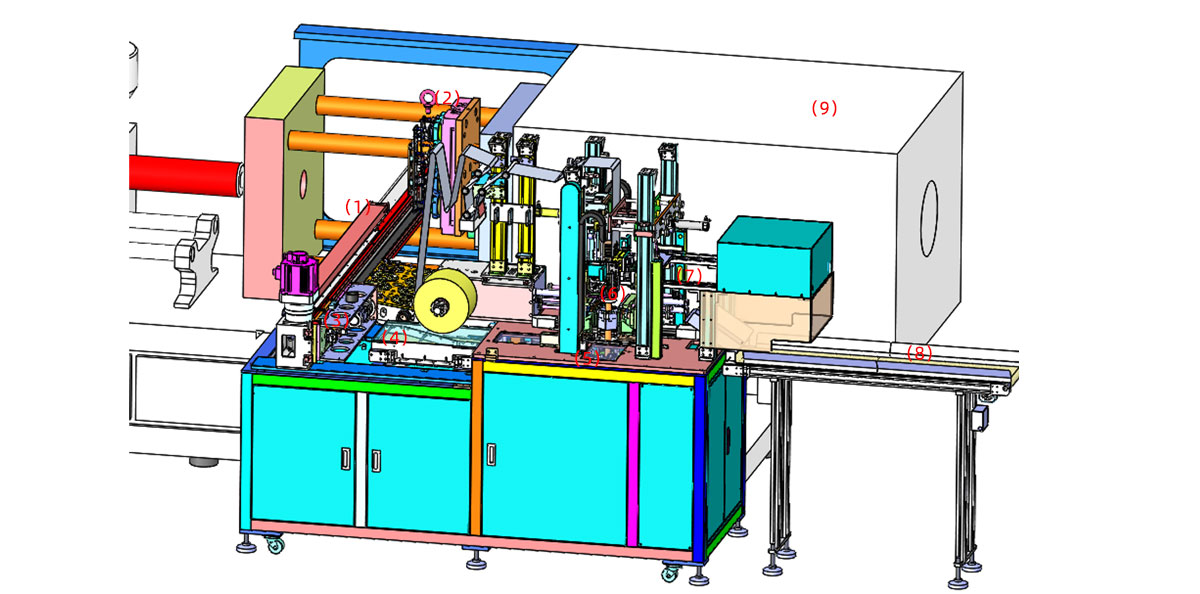
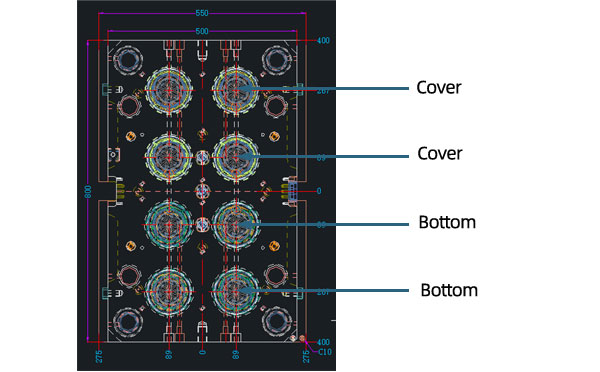
Mold Layout Deisgn
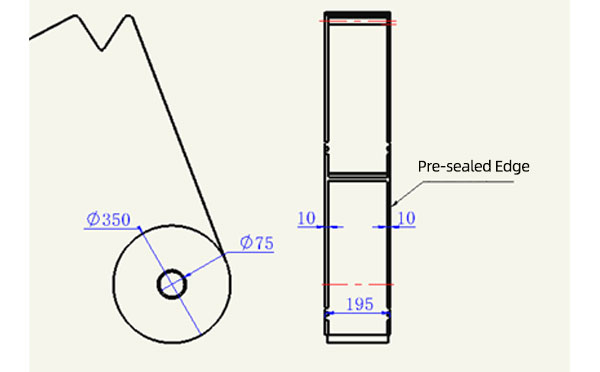
Sleeve Size for Package with Vacuum Request
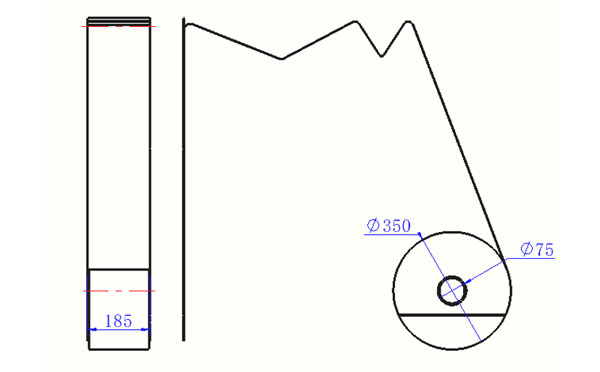
Sleeve Size for Package without Vacuum Request
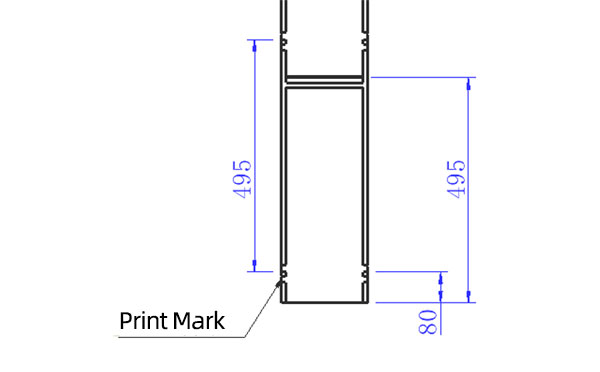
Sleeve (With Mark) Size for Package with Vacuum Request

Sleeve (With Mark) Size for Package without Vacuum Request
I think you'll have an overall understanding about the SWITEK top/side entry petri dish packing system. If you still have any other question about it or need any help in your petri dish production project, please feel free to contact SWITEK laboratory consumable plastic parts injection molding solutions team for more information.
HuangYanZheng©Copy Right


