
sales06@switek.biz

+86 186 5927 5869

Subscript to Us
sales06@switek.biz
+86 186 5927 5869
Subscript to Us
Keywords:Panasonic A6 Servo Installation Instruction, Panasonic A6 Driver, Panasonic A6 Series Servo Motor Manual
The correct setup of the parameter and mode of the Panasonic A6 series of servo will ensure the proper working of the Panasonic A6 series of motor and the stability of your machineries and automation system.
This driver is equipped with various parameters to set up its characteristics and functions. This section describes the function and purpose of each parameter. Read and comprehand very well so that you can adjust this driver in optimum condition for your running requirements.
• You can refer and set up the parameter with either one of the following.
1) front panel of the driver
2) combination of the setup support software, "PANATERM" and PC.
Note → How to control the front panel, refer to P.2-74.
It is possible to connect your personal computer to connector X1 of MINAS A6 using a USB cable for personal computer connection. Downloading the setup support software "PANATERM" from out web site and installing it on your personal computer will allow you to perform the following easily. • With the PANATERM, you can execute the followings.
Note → Because no production software such as CD-ROM is available, download the setup support software from our web site and install it on your personal computer.
• USB cable
On the driver, use commercially available USB mini-B connector.
The connector on the personal computer side should be in accordance with the specifications of the PC.
When the cable does not have noise filter, attach a signal line noise filter (DV0P1460) to both ends of the cable.
Related page → • P.4-2 "Details of Parameter" • P.7-26 "Setup support software [PANATERM]"
| Parameter No. | Class name | Group | page | |
|---|---|---|---|---|
| Class | No.* | |||
| 0 | 00 to 18 | Basic setting | Parameter for Basic setting | P.2-52 |
| 1 | 00 to 78 | Gain adjustment | Parameter for Gain adjustment | P.2-52 |
| 2 | 00 to 37 | Damping control | Parameter fro Damping | P.2-55 |
| 3 | 00 to 29 | Verocity/Torque/Full-closed control | Parameter for Verocity/Torque/Fullclosed control | P.2-57 |
| 4 | 00 to 57 | I/F monitor setting | Parameter for I/F monitor setting | P.2-58 |
| 5 | 00 to 86 | Enhancing setting | Parameter for Enhancing setting | P.2-60 |
| 6 | 00 to 98 | Special setting | Parameter for Special setting | P.2-63 |
| 7 | 00 to 93 | Special setting | Parameter for Special setting | P.2-66 |
| 8 | 00 to 19 | For manufacturer's use | Not be used. | P.2-67 |
| 9 | 00 to 50 | For manufacturer's use | Not be used. | P.2-68 |
| 15 | 00 to 35 | For manufacturer's use | Not be use | P.2-69 |
*The Parameter No. consists of 2 digits.
| Symbol | Control mode | Setup value of Pr0.01 |
|---|---|---|
| P | Position control | 0 |
| S | Velocity control | 1 |
| T | Torque control | 2 |
| F | Full-closed control | 6 |
| P/S | Position (1st/Velocity (2nd) control | 3* |
| P/T | Position (1st/Torque (2nd) control | 4* |
| S/T | Velocity (1st/Torque (2nd) control | 5* |
* When you select the combination mode of 3, 4 or 5, you can select either 1st or 2nd with control mode switching input (C-MODE).
When C-MODE is ON: 1st mode selection
When C-MODE is OFF: 2nd mode selection
Do not enter the command 10ms before/after the switching.
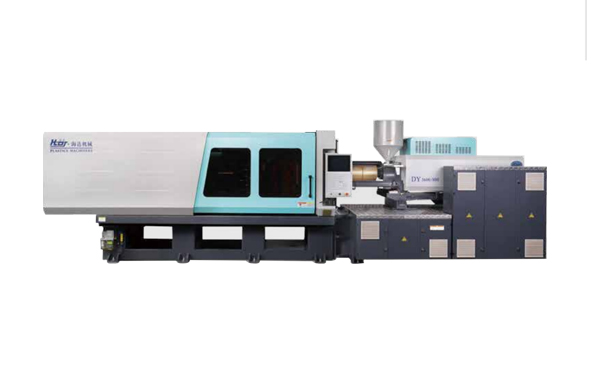
HD130LDY -- HaiDa Hybrid Injection Molding Machine
| No. | Name | Value |
|---|---|---|
| 1 | Clamping Force | 1300 kN |
| 2 | Shot Weight | 122 g |
| 3 | Shot Speed | 200 mm/s |
| 4 | Screw Diameter | 32 mm |
| 5 | Opening Stroke | 380 mm |
| 6 | Space Between Tie Bars | 420 x 420 mm |
| 7 | Mold Thickness (Min) | 150 mm |
| 8 | Mold Thickness (Max) | 450 mm |
| 9 | Pumper Motor | 49 kW |
| 10 | Heating Capacity | 7.5 kW |
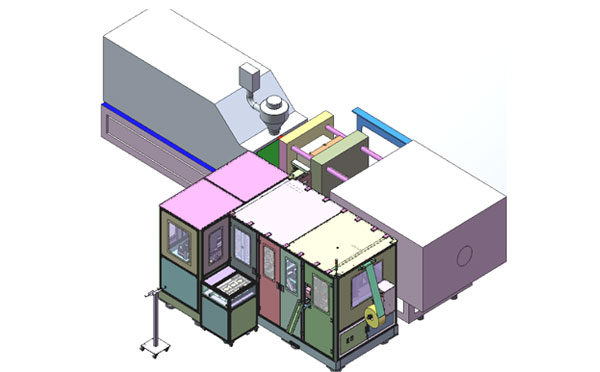
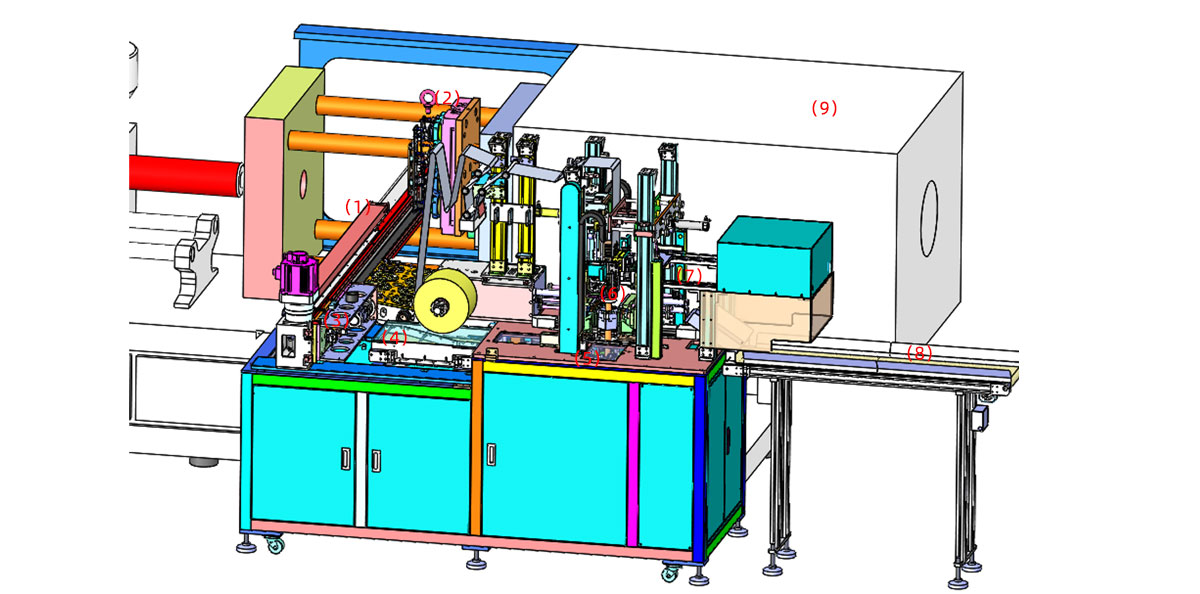
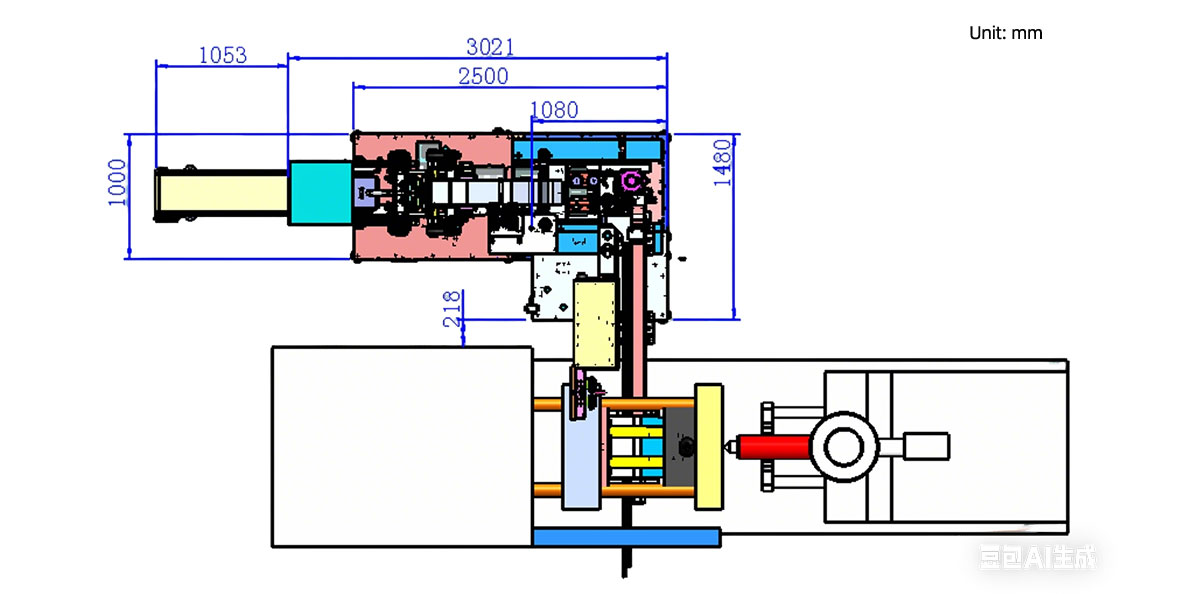
The SWITEK side entry petri dish packing system is a custom made automation system for the stable production of laboratory consumable plastic petri dish with the picking robot, the petri dish assembly, stacking, packing unit etc. integrated as auniformed system for the efficient and stable production of the petri dish. The system can be custome made for a petri dish mold layout design of 2+2, 4+4, 6+6, 8+8 etc.
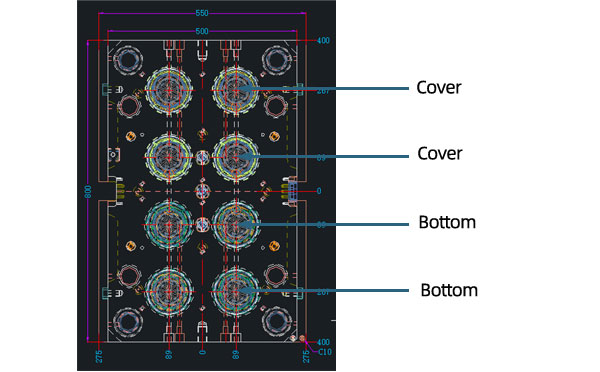
Mold Layout Deisgn
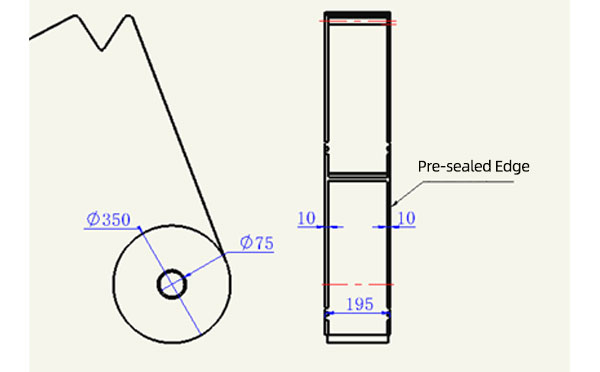
Sleeve Size for Package with Vacuum Request
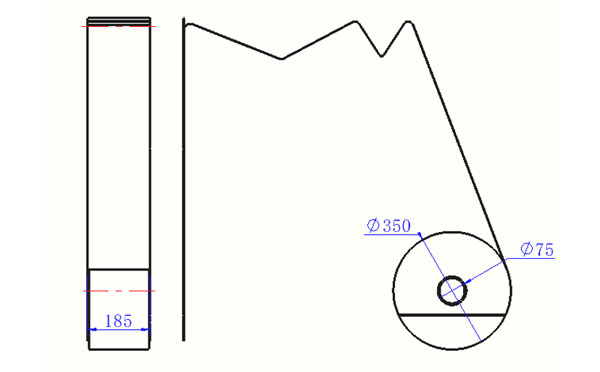
Sleeve Size for Package without Vacuum Request
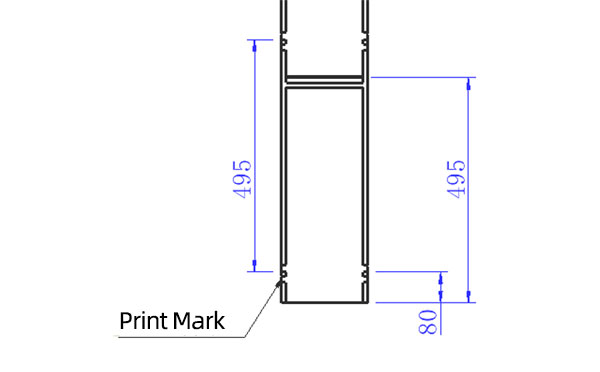
Sleeve (With Mark) Size for Package with Vacuum Request

Sleeve (With Mark) Size for Package without Vacuum Request
I think you'll have an overall understanding about the SWITEK top/side entry petri dish packing system. If you still have any other question about it or need any help in your petri dish production project, please feel free to contact SWITEK laboratory consumable plastic parts injection molding solutions team for more information.
HuangYanZheng©Copy Right


