
sales06@switek.biz

+86 186 5927 5869

Subscript to Us
sales06@switek.biz
+86 186 5927 5869
Subscript to Us
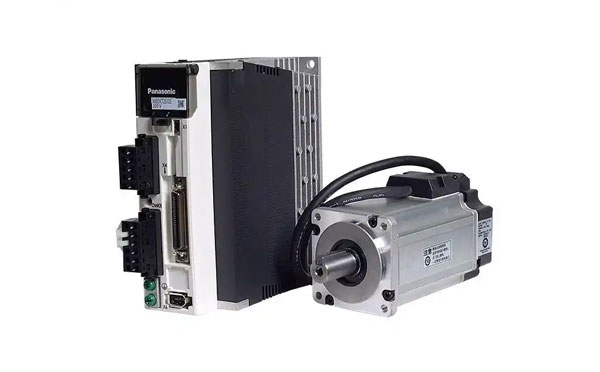
Keywords:Panasonic A6 Servo Motor, Panasonic A6 Servo Motor Driver, Panasonic A6 Servo Motor setting instruction
A routine maintenance and inspection of the driver and motor are essential for the proper and safe operation of the Panasonic A6 series motors in your injection automation system. Here in this chapter you'll have an overall idea of what's to do and not to do in the routine maintenance and inspection of the Panasonic A6 series motor and driver.
Routine maintenance and inspecdtion of the driver and motor are essential for the proper and safe operation.
Notes on Maintenance and Inspection
Inspection Items and Cycles
General and normal running condition
Ambient conditions: 30°C (annual average), load factor of 80% or lower, operating hours of 20 hours or less per day.
Perform the daily and periodical inspection as per the items below.
| Type | Cycles | Items to be Inspected |
|---|---|---|
| Daily Inspection | Cycle |
|
| Motor with Gear Reducer | Annual |
|
Note: Inspection cycle may change when the running conditions of the above change.
Guideline for Parts Replacement
Use the table below for a reference. Parts replacement cycle varies depending on the actual operating conditions. Defective parts should be replaced or repaired when any error have occurred.
 Prohibited | Disassembling for inspection and repair should be carried out only by authorized dealers or service company. |
| Product | Component | Standard Replacement Cycles (Hour) | Note |
|---|---|---|---|
| Driver | Smoothing condenser | Approx. 5 years | These hours or cycles are reference. When you experience any error, replacement is required even before this standard replacement cycle. |
| Cooling Fan | 2 to 3 years (10000 to 30000 hours) | ||
| Aluminum electrolytic capacitor (on PCB) | Approx. 5 years | ||
| Rush current preventive relay | Approx.100000 times (depending on working condition) | ||
| Rush current preventive resistor | Approx. 20000 times (depending on working condition) | ||
| Motor | Bearing | 3 to 5 years (20000 to 30000 hours) | |
| Oil seal | 5000 hours | ||
| Encoder | 3 to 5 years (20000 to 30000 hours) | ||
| Battery for absolute encoder | Life time of battery read P7-14 please |
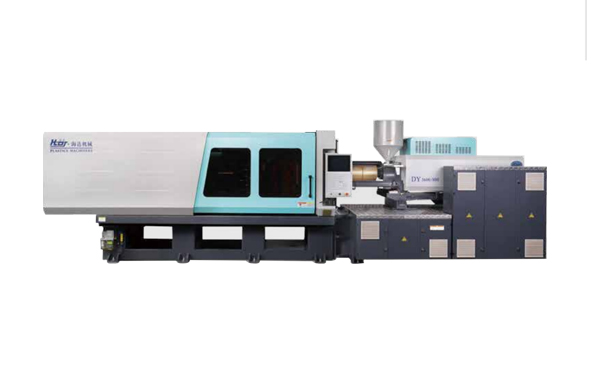
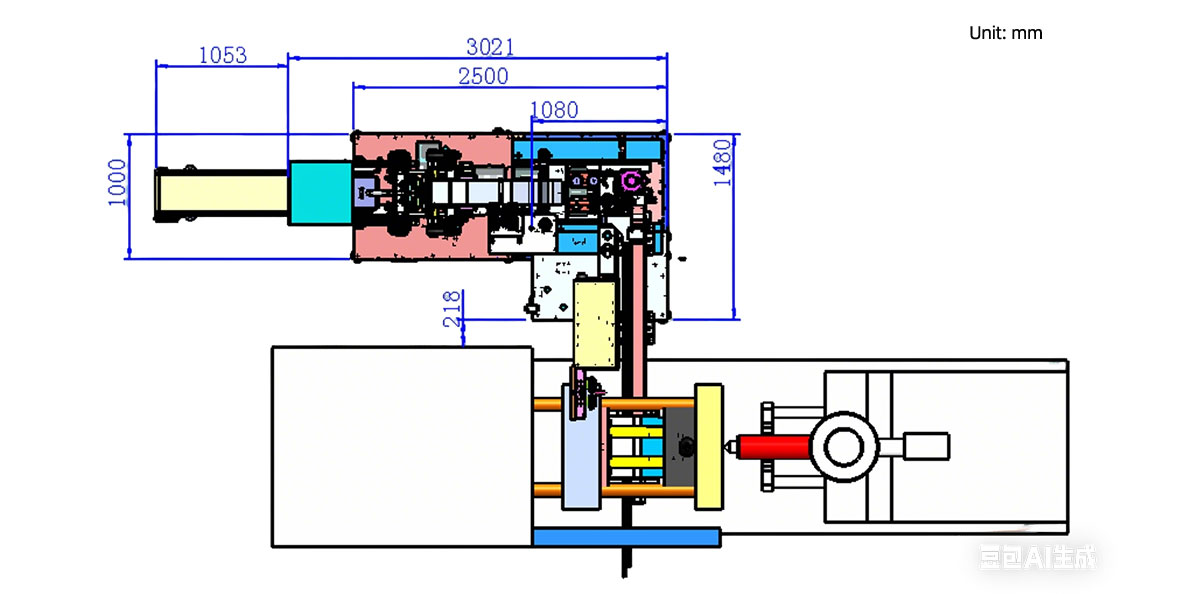
HD130LDY -- HaiDa Hybrid Injection Molding Machine
| No. | Name | Value |
|---|---|---|
| 1 | Clamping Force | 1300 kN |
| 2 | Shot Weight | 122 g |
| 3 | Shot Speed | 200 mm/s |
| 4 | Screw Diameter | 32 mm |
| 5 | Opening Stroke | 380 mm |
| 6 | Space Between Tie Bars | 420 x 420 mm |
| 7 | Mold Thickness (Min) | 150 mm |
| 8 | Mold Thickness (Max) | 450 mm |
| 9 | Pumper Motor | 49 kW |
| 10 | Heating Capacity | 7.5 kW |
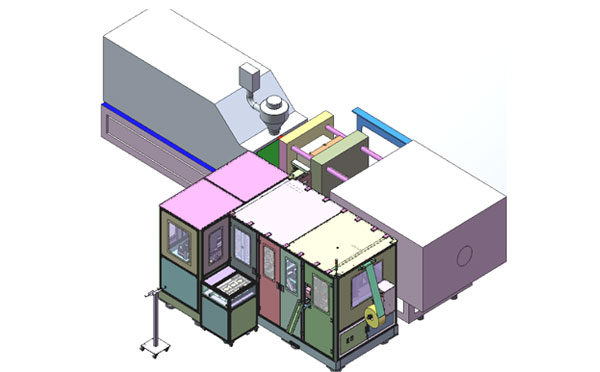
The SWITEK side entry petri dish packing system is a custom made automation system for the stable production of laboratory consumable plastic petri dish with the picking robot, the petri dish assembly, stacking, packing unit etc. integrated as auniformed system for the efficient and stable production of the petri dish. The system can be custome made for a petri dish mold layout design of 2+2, 4+4, 6+6, 8+8 etc.
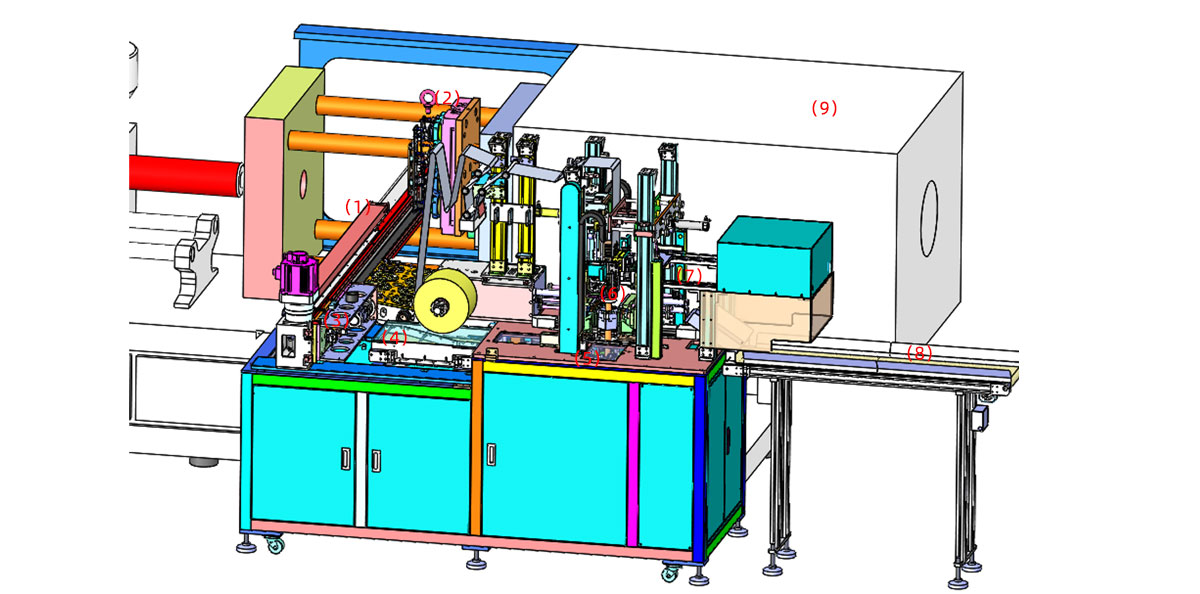
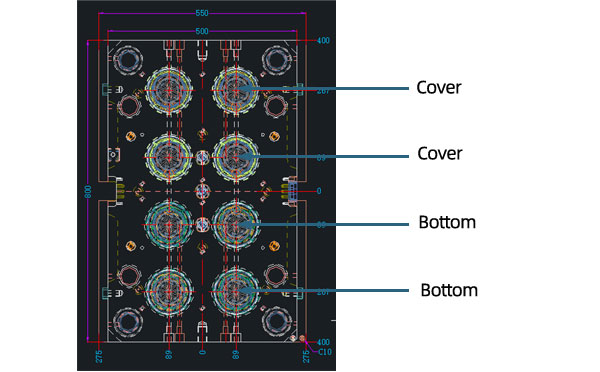
Mold Layout Deisgn
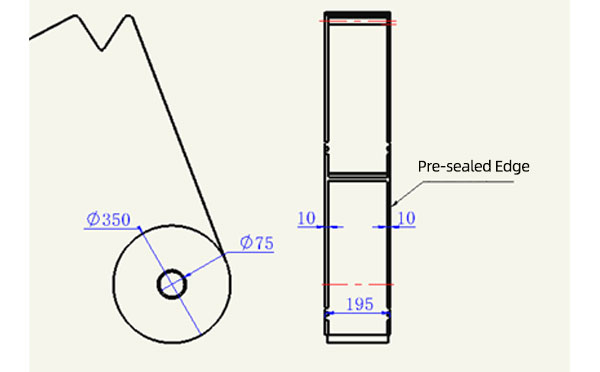
Sleeve Size for Package with Vacuum Request
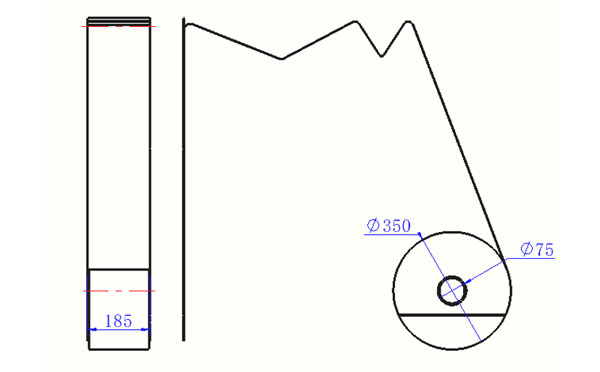
Sleeve Size for Package without Vacuum Request
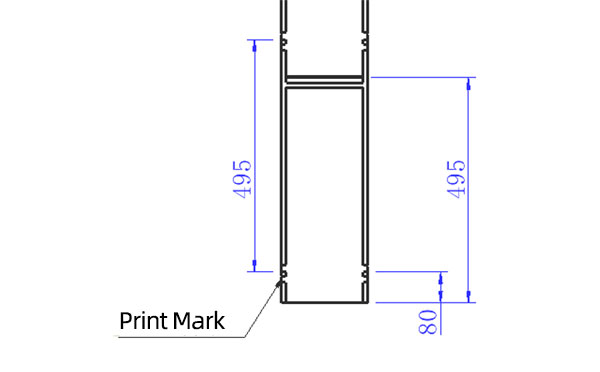
Sleeve (With Mark) Size for Package with Vacuum Request

Sleeve (With Mark) Size for Package without Vacuum Request
I think you'll have an overall understanding about the SWITEK top/side entry petri dish packing system. If you still have any other question about it or need any help in your petri dish production project, please feel free to contact SWITEK laboratory consumable plastic parts injection molding solutions team for more information.
HuangYanZheng©Copy Right


