
sales06@switek.biz

+86 186 5927 5869

Subscript to Us
sales06@switek.biz
+86 186 5927 5869
Subscript to Us
Keywords:IML Robot; IML Robot Operating; In Mold Labeling Robotics
With the IML control system designed "Easy to operate", we can program the robot by selecting the standard programs and have it inserted into the program step by step. Here in this chapter we're introducing the setting of the axis positions of the IML robot.
Position setting
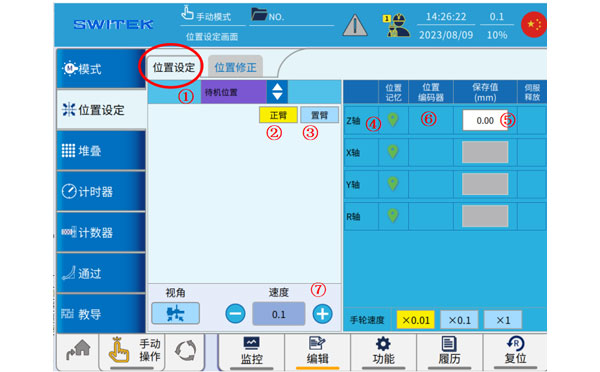
| No | Name | Function |
|---|---|---|
| (1) | Position selection | Click to select the point you want to set. |
| (2) | Main-arm selection | Click to switch to the two axes of the main arm, and cooperate with the button (7) to move the axis. |
| (3) | Sub-arm selection | Click to switch to the two axes of the jig, and cooperate with the button (7) to move the shaft. |
| (4) | Current position memory | Click the icon to set the current position of the axis to the point (after returning to the original point). |
| (5) | Point set point | (1) select the point and set the value. Click to make a changes. |
| (6) | Current axis position | The current position of the axis is displayed. |
| (7) | Manual speed setting | Manual speed setting |
Steps to set the point:
Position corrections
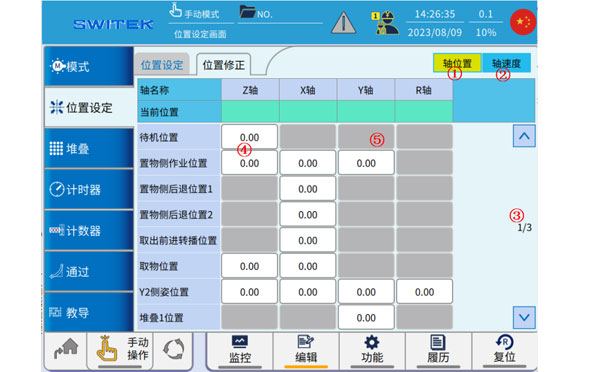
| No | Name | Function |
|---|---|---|
| (1) | Axis position | Automatically click to switch to the axis position modification |
| (2) | Axis Speed | Automatically click to switch to the axis speed modification |
| (3) | Page | Flip up and down to switch points |
| (4) | Position (Modifiable) | The white point can be clicked automatically for fine-tuning. |
| (5) | Position (not modifiable) | Gray point, cannot be modified |
This page is mainly used for an overview of the points set by the location, and when it is automatic, you can click on the point at (4) to fine-tune it.
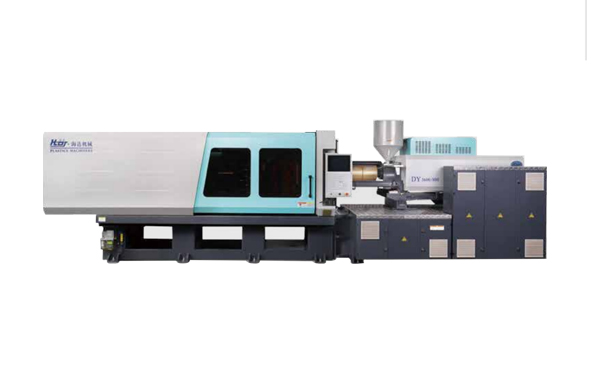
HD210LDY -- HaiDa Hybrid Injection Molding Machine
| No. | Name | Value |
|---|---|---|
| 1 | Clamping Force | 2100 kN |
| 2 | Shot Weight | 326 g |
| 3 | Shot Speed | 200 mm/s |
| 4 | Screw Diameter | 45 mm |
| 5 | Opening Stroke | 500 mm |
| 6 | Space Between Tie Bars | 530 x 530 mm |
| 7 | Mold Thickness (Min) | 200 mm |
| 8 | Mold Thickness (Max) | 550 mm |
| 9 | Pumper Motor | 90 kW |
| 10 | Heating Capacity | 16 kW |
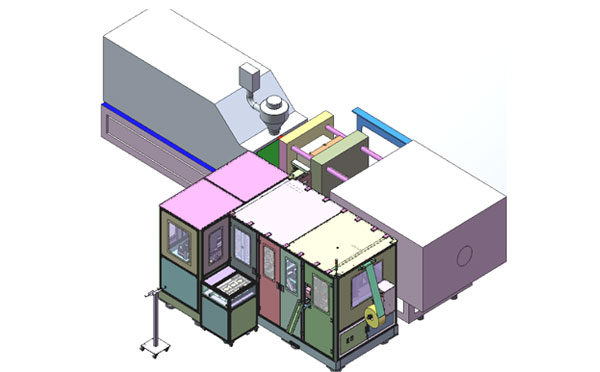
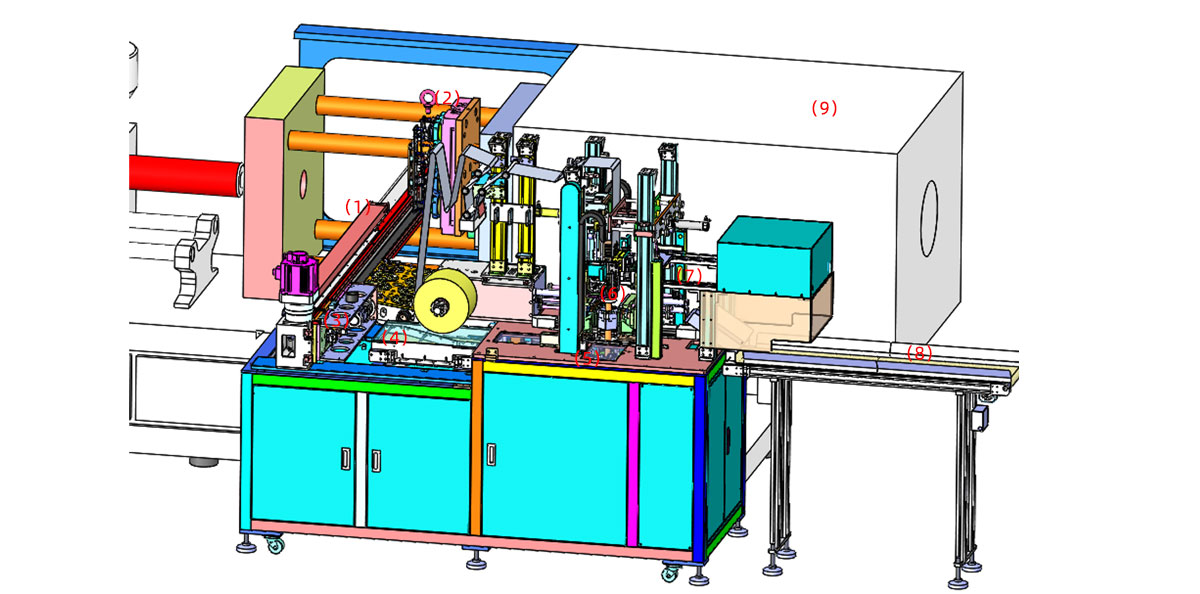
The SWITEK side entry petri dish packing system is a custom made automation system for the stable production of laboratory consumable plastic petri dish with the picking robot, the petri dish assembly, stacking, packing unit etc. integrated as auniformed system for the efficient and stable production of the petri dish. The system can be custome made for a petri dish mold layout design of 2+2, 4+4, 6+6, 8+8 etc.
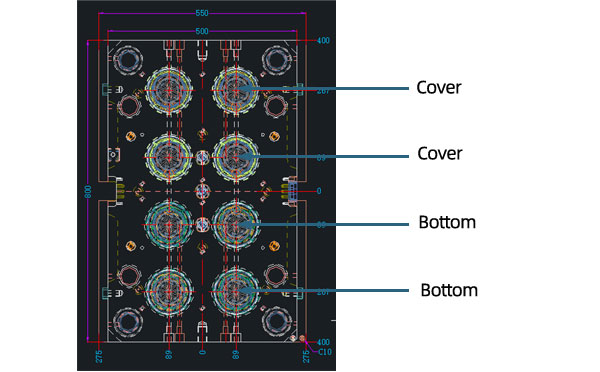
Mold Layout Deisgn
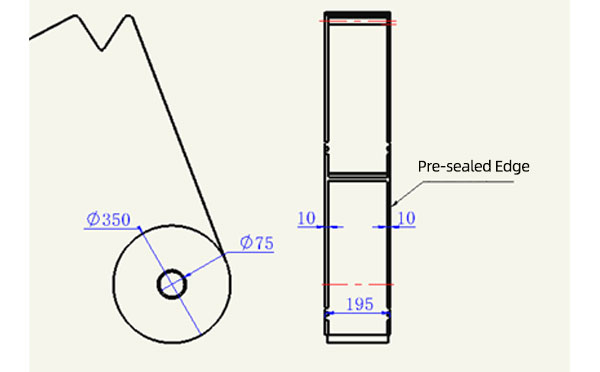
Sleeve Size for Package with Vacuum Request
Sleeve Size for Package without Vacuum Request
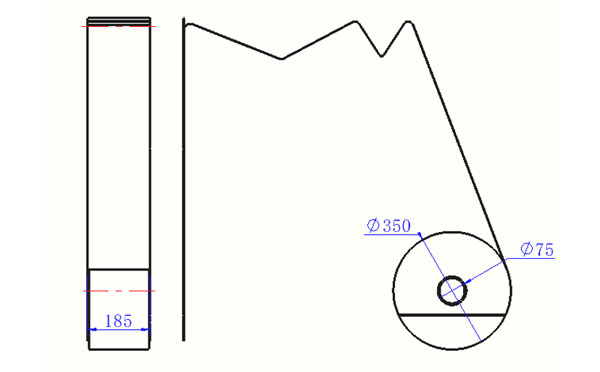
Sleeve (With Mark) Size for Package with Vacuum Request

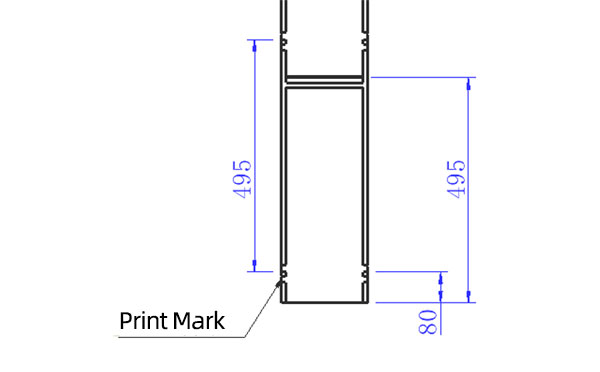
Sleeve (With Mark) Size for Package without Vacuum Request
I think you'll have an overall understanding about the SWITEK top/side entry petri dish packing system. If you still have any other question about it or need any help in your petri dish production project, please feel free to contact SWITEK laboratory consumable plastic parts injection molding solutions team for more information.
HuangYanZheng©Copy Right


