
sales06@switek.biz

+86 186 5927 5869

Subscript to Us
sales06@switek.biz
+86 186 5927 5869
Subscript to Us
Keywords:IML Robot; IML Robot Operating; In Mold Labeling Robotics
Pendent setting here is to introduce how to set the parameters of the system which include the system seting, the user permissions setting, the Network setting etc. to have the IML robot working comfortably and safely.
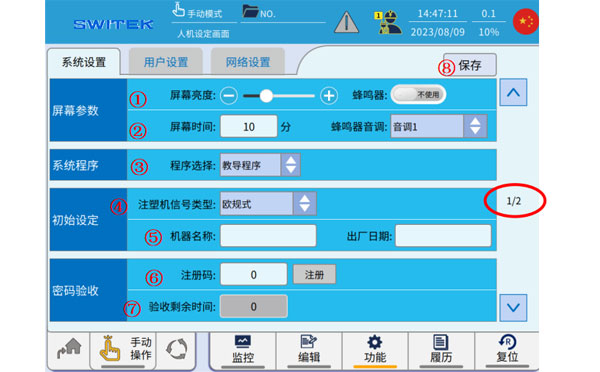
System Setting
| No. | Name | Function |
|---|---|---|
| (1) | Screen Brightness | Adjust the screen brightness by "+" and "-". |
| (2) | Screen time | Tap to set the holding time for the screen to light up without operation. |
| (3) | Program selection | Use a teaching program or a fixed program selection. |
| (4) | IMM Selection | The European Style, Chinese style, and Japanese style of the injection molding machine are selected, and the signal processing (clearance, mold area safety, etc.) of different styles is different. |
| (5) | Machine name, Factory time | Set the name of the machine and the date of manufacture. |
| (6) | Registration code | After using the password acceptance function, you can obtain the permission and time of use through the registration code issued by the manufacturer. |
| (7) | Time remaining for accpetance | After using the password acceptance function, the remaining time to continue using it is displayed here. When the remaining time is 0, the robot will not be able to enter the automatic operation. |
| (8) | Save | After the above settings are modified, you must click Save. Otherwise, if the power is back on, the modified items may not be maintained. |
After you have modified each of the system settings, click "Save".
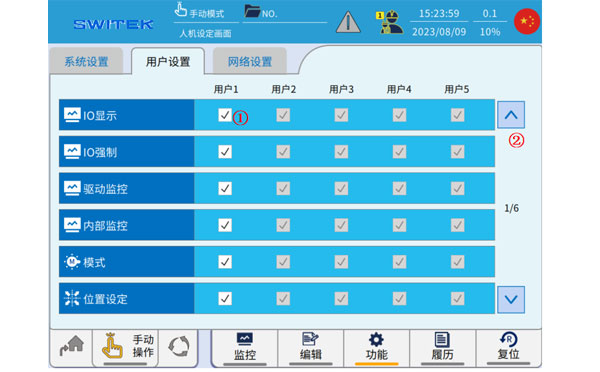
User settings
| No. | Name | Function |
|---|---|---|
| (1) | Set up | Click "√" to indicate that the function is enabled in the user permission. |
| (2) | Page | Scroll up or down to view the assignment of permissions. |
The operation authority of each user can be assigned through the setting in above figure to facilitate the operation and management of the site. (Higher-level users can be assigned permissions to low-level users by logging in. )
Network settings
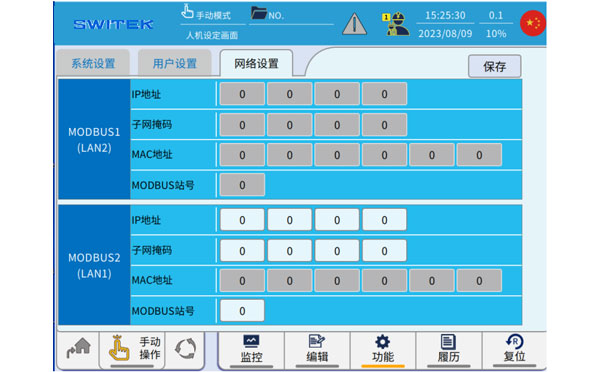
As shown in the figure above, two sets of MODBUS communication IP addresses are set, please click "Save" when completed.
The two sets of IP addresses are set for the following two network ports:

HD300KDY -- HaiDa Hybrid Injection Molding Machine
| No. | Name | Value |
|---|---|---|
| 1 | Clamping Force | 3000 kN |
| 2 | Shot Weight | 402 g |
| 3 | Shot Speed | 350 mm/s |
| 4 | Screw Diameter | 50 mm |
| 5 | Opening Stroke | 550 mm |
| 6 | Space Between Tie Bars | 590 x 590 mm |
| 7 | Mold Thickness (Min) | 220 mm |
| 8 | Mold Thickness (Max) | 600 mm |
| 9 | Pumper Motor | 147 kW |
| 10 | Heating Capacity | 21 kW |
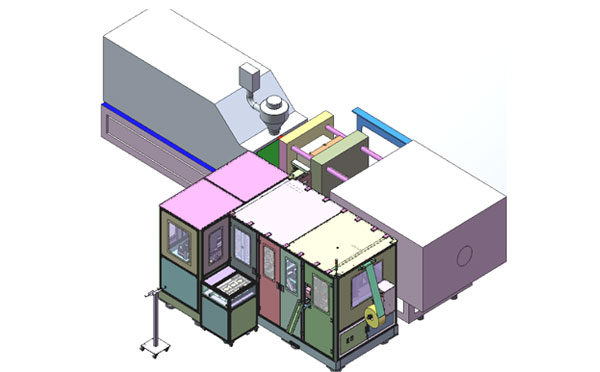
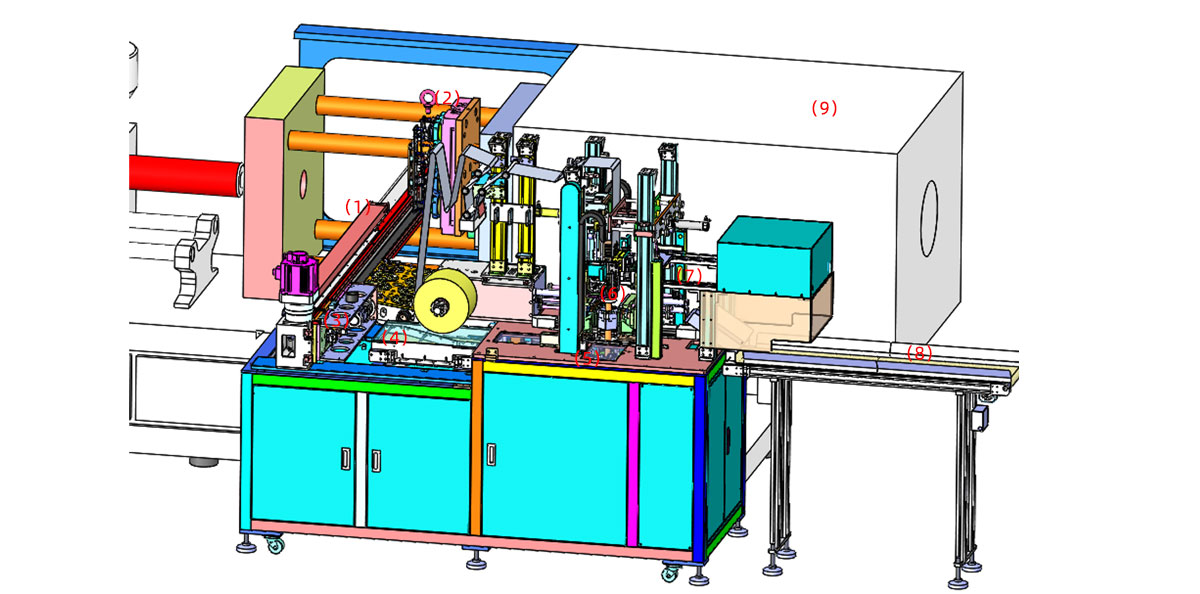
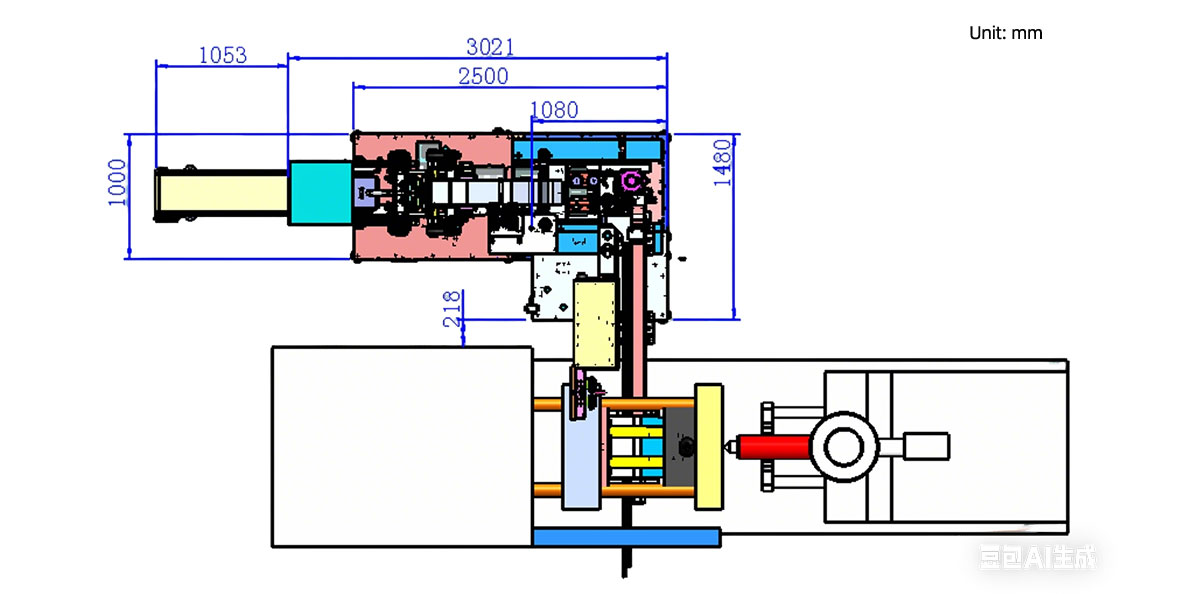
The SWITEK side entry petri dish packing system is a custom made automation system for the stable production of laboratory consumable plastic petri dish with the picking robot, the petri dish assembly, stacking, packing unit etc. integrated as auniformed system for the efficient and stable production of the petri dish. The system can be custome made for a petri dish mold layout design of 2+2, 4+4, 6+6, 8+8 etc.
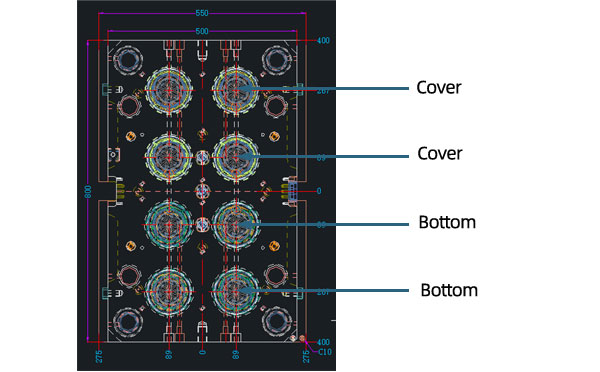
Mold Layout Deisgn
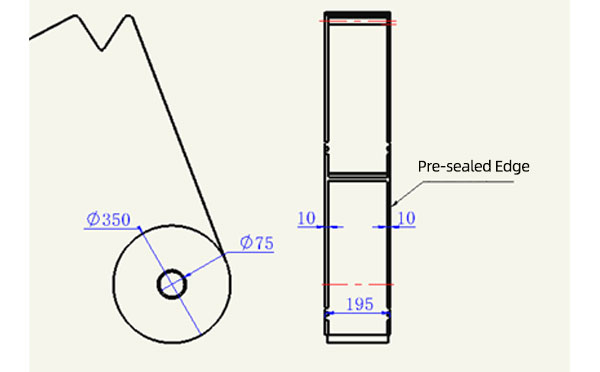
Sleeve Size for Package with Vacuum Request
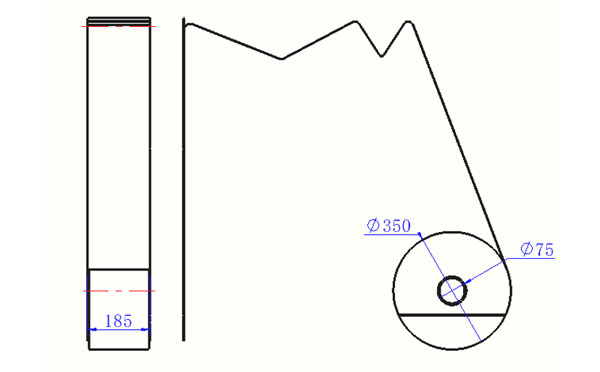
Sleeve Size for Package without Vacuum Request
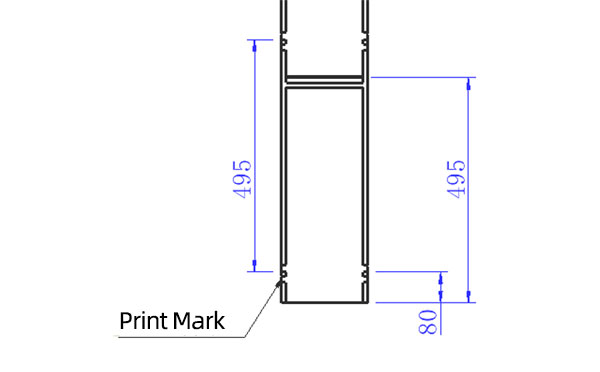
Sleeve (With Mark) Size for Package with Vacuum Request

Sleeve (With Mark) Size for Package without Vacuum Request
I think you'll have an overall understanding about the SWITEK top/side entry petri dish packing system. If you still have any other question about it or need any help in your petri dish production project, please feel free to contact SWITEK laboratory consumable plastic parts injection molding solutions team for more information.
HuangYanZheng©Copy Right


